This seemingly minor issue can quickly turn into a major inconvenience, as a functional oven light is crucial for monitoring the progress of your dishes. When the oven interior light refuses to illuminate, it can create uncertainty about the doneness of your culinary creations, especially when you can’t see through the oven door. In this article, we get you cover how to troubleshoot and reliable Thermador oven repair
Common Causes of an Oven Interior Light Not Working
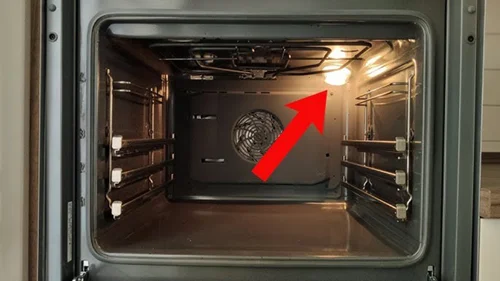
Burnt-Out Light Bulb
One of the most frequent reasons for an oven’s interior light not working.
- Over time, like any other light bulb, the one inside your oven can reach the end of its lifespan.
- The light ceases to function when the bulb burns out.
Faulty Light Socket
In some cases, the problem doesn’t lie with the bulb itself but with the light socket.
- The socket may develop issues that prevent the bulb from making proper contact, resulting in no illumination.
- This is often due to wear and tear or corrosion.
Wiring Problems
Issues in the oven’s electrical system wiring can disrupt the flow of electricity to the light bulb.
- Loose, damaged, or frayed wires can cause intermittent or complete loss of illumination.
- These wiring problems are more complex than a burnt-out bulb or faulty socket and usually require professional attention.
Issues with the Door Switch
The door switch plays a crucial role in controlling the oven light.
- It is responsible for activating the light when you open the oven door and deactivating it when you close the door.
- If the door switch malfunctions or gets stuck in the off position, it can lead to the light not turning on when the door is open.
Troubleshooting and Solutions
When dealing with an oven’s interior light that’s not working, it’s essential to follow a systematic approach to identify and resolve the issue. Here are the steps to troubleshoot and potential solutions:
1. Safety Precautions
Your safety is paramount when working with any electrical appliance. To ensure safe troubleshooting:
- Disconnect the oven from its power source. This step is crucial to avoid electrical hazards while examining or repairing the appliance.
2. Inspecting the Light Bulb
The first step is to determine whether the problem stems from a burnt-out bulb. To inspect and replace the bulb:
- Carefully remove the bulb from its socket.
- Examine the bulb closely; if it appears blackened or if you notice a visibly broken filament, it’s a clear indication that the bulb is burnt out. The solution is to replace it with a new one. Ensure the replacement bulb has the correct specifications for your oven.
3 Examining the Light Socket
If the bulb is not the issue, it’s time to check the light socket:
- Ensure the light socket is clean and free from dirt, grease, or any debris that might obstruct a proper connection.
- Inspect the socket for signs of damage or corrosion. If you find any, it might be necessary to repair or replace the socket. It’s important that the bulb makes secure and consistent contact with the socket to function correctly.
4. Investigating Wiring
When issues go beyond the bulb and socket, it’s time to delve into the wiring within the oven:
- Carefully examine the wiring connected to the light socket and the oven’s electrical system.
- Look for any loose, damaged, or frayed wires. Wiring problems can disrupt the flow of electricity to the light bulb, leading to illumination issues.
- In the case of damaged or problematic wiring, it’s vital to have these issues addressed by a qualified technician. Electrical repairs should always be handled by professionals to ensure safety and proper functionality.
5. Testing the Door Switch
The door switch is instrumental in controlling the oven light based on the oven door’s status:
- Test the functionality of the oven’s door switch. Open and close the oven door while observing the light’s behavior.
- If you find that the door switch is malfunctioning, often indicated by the light not turning on when the door is open, it may need replacement. The door switch is a relatively common and manageable part to replace.
In some cases, addressing these issues may require professional assistance, especially when dealing with electrical components. Always prioritize safety and consult with a qualified technician if needed.
Replacing the Oven Light Bulb
Now that you’ve identified the issue and determined that the light bulb is the culprit, it’s time to replace it. Here’s a step-by-step guide for safely and effectively replacing the oven light bulb:
1. Safety Precautions
Safety should be your top concern when performing any maintenance on electrical appliances. Before starting the replacement process:
- Turn off the oven completely. Ensure it’s not in operation or in any active mode.
- Unplug the oven from its power source. This is crucial to prevent any electrical hazards while handling the appliance.
2. Identifying the Correct Bulb
To ensure a successful replacement, you must use the correct replacement bulb designed for your specific oven model. Here’s how to identify the right bulb:
- Refer to the oven’s manual: Your oven’s user manual often contains information about the type and specifications of the appropriate replacement bulb.
- Consult the manufacturer: If you can’t find the required information in the manual, get in touch with the oven’s manufacturer or visit their official website for guidance on the correct replacement bulb.
3. Replacing the Light Bulb
Once you’ve obtained the correct replacement bulb, it’s time to proceed with the replacement process:
- Carefully locate the burnt-out bulb inside the oven. The exact placement may vary depending on your oven model.
- Gently remove the burnt-out bulb from its socket. Make sure not to apply excessive force, as this can damage the socket.
- Take the new replacement bulb and insert it securely into the socket. Ensure it’s properly seated to establish a consistent electrical connection.
4. Testing the New Bulb
With the replacement bulb in position, it’s essential to confirm that it functions correctly:
- Turn on the oven light. This can typically be done via the oven’s control panel or a specific light switch.
- If the new bulb illuminates, you have successfully replaced it, and your oven’s interior light should be fully functional once again.